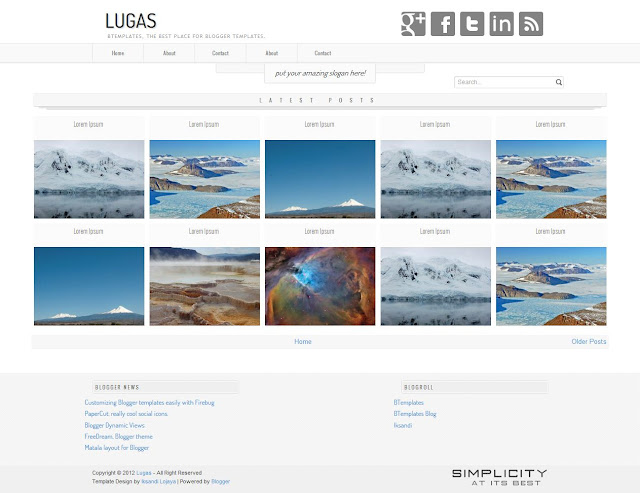
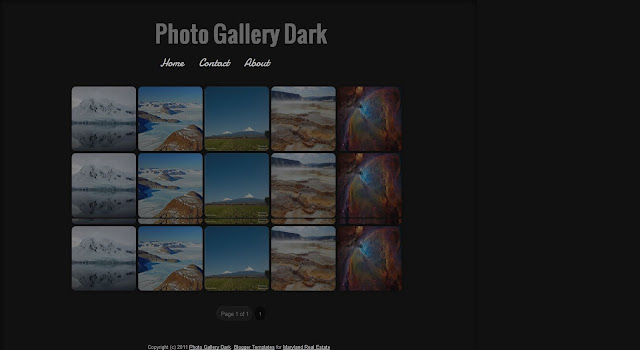
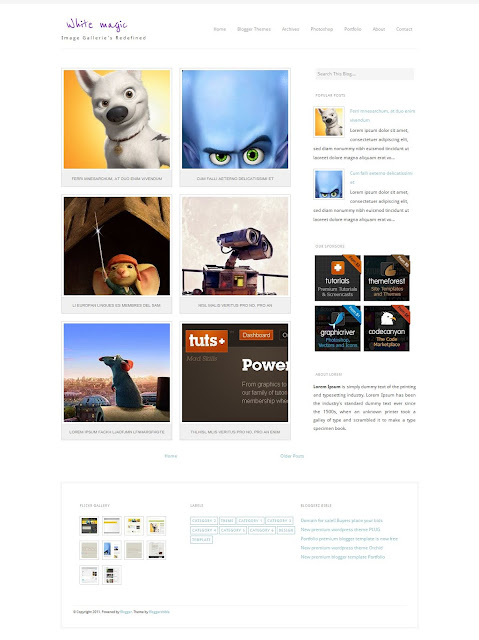
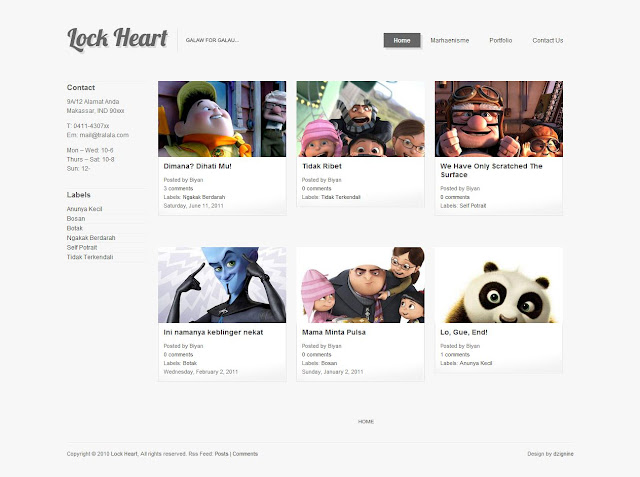
Template name : LK Magazine version 3 Template type : 3 Sidebar, 4 Column, 3 Column footer, Featured Section, Fixed width, Header Banner, Left Sidebar, Magazine, Premium, Right Sidebar, Slider, Tabbed widget, Top Navigation Bar, White Release date : 08-29-2010 Coder/Designer Name(s) : Lasantha Bandara Coder/Designer URL(s) : http://www.premiumbloggertemplates.com/ http://www.bloggertipandtrick.net/ Basic Instructions : How to install a Blogger templateAdvanced Details : http://www.premiumbloggertemplates.com/2010/08/lk-magazine-v3-premium-blogger-template.html |
Template Features- Column: 4 Columns/3 Sidebars/Right Sidebars/Left Sidebar
- Fixed Width Template (1000px width)
- 2 Horizontal Navigation Menus
- Auto Read More Feature with Thumbnails.
- 468*60 Header Ads banner
- 125*125 Sidebar Banners
- 468*60 Header Logo with the PSD file and Fonts.
- 1 CSS Search Box
- 1 Multi Tab View Widget installed.
- 1 Featured Auto content slider installed.
- 3 Column Footer section
- Facebook Like Button installed.
- SEO friendly blogger title hack installed to help you rank higher in Google
- Blogger Default Heading Tag has Changed for better SEO
- Meta tags installed
- Top Bar with Feed buttons and Display Day,Month,Year
- Hosted images on blogger. Free use forever!
- Favicon support so you can add your own url icon
- Compressed CSS to speed up your page load times
- Embedded JavaScript date code showing current day
- Built-in Related Posts Widget to show Related posts
- Numbered Page Navigation Hack Installed
- Replace "Older Posts","Home","Newer Posts" Text Navigation with Images
- Automatically highlight author comments
- Modified Comments Section to Enable Avatars in Blogger Comments
- More ...
Template Layout Structure 3 Column Footer Section
 Template CustomizationBasic Template Installation:
1.First download the template and unzip the file.
2.Now, sign in to Blogger dashboard and click on the layout.
3.Here is the important step, after uploading any new Blogger template, all of the previous widgets like your google adsense ads,text,profile,poll,etc etc will be lost.
So, to avoid this to happen, in this step click on 'edit' on all the widgets and copy the codes into notepad,etc.
4.Now click on the 'Edit html' tab
5.First of all please Download Full Template.This is to back up your present template.If the new template that you are going to upload makes/gets into some errors or if you make more complex errors in that,then you will loose everthing.So make sure that you back up your template.
6.Just below that,there's an option of uploading new template.So, use the Browse button and upload the downloaded xml file.
7.Now, a message appear saying that your widgets are about to be deleted.Click on the Confirm & Save (no problem doing this because we already copied the widget codes in Step 3).
8.Now click on "confirm and save".Now you successfully installed the template.
8.Click on the 'Page elements' page now and add the codes that you copied in step3 using the 'Add a Page Element' option.
Configure Meta tagsLogin to your blogger dashboard--> layout- -> Edit HTML.Now Scroll down to where you see below codes :
<meta content='DESCRIPTION HERE' name='description'/>
<meta content='KEYWORDS HERE' name='keywords'/>
Replace
DESCRIPTION HERE,
KEYWORDS HERE as below.
DESCRIPTION HERE:Write your blog description
KEYWORDS HERE:Write the keywords of your blog separated by comma.
Configure First and Second Navigation BarLogin to your blogger dashboard--> layout- -> Edit HTML.Now Scroll down to where you see below code :
<li><a href='Your-Link-Here' title='Link-Title'>Link-Name-X</a>
Now Replace Your-Link-Here,Link-Title,Link-Name-X with your details.
Configure Header logoLogin to your blogger dashboard--> layout- -> Edit HTML.Now Scroll down to where you see below line :
https://blogger.googleusercontent.com/img/b/R29vZ2xl/AVvXsEiZyrJ4eD4YsgrTH0Ki1eQWcWwDD2z23Q9Az5EYISEGT99NAf7v4OXcjcy9taBywsrp1NTXiOeH0RMLvtuqm-D0KtT-e0Jnvj9rWNtZpSblqycuA-s4SJjCL1-WfEeWAFNt0XTh-geAbuI//+Magazine+v3+logo.png
Now replace it with your logo address/url.
Configure Subscription Box:Add this code into the HTML/JavaScript box.
<div class='subsboxfull'>
<a href='your-twitter-url' rel='nofollow' target='_blank' title='twitter'><img src="https://blogger.googleusercontent.com/img/b/R29vZ2xl/AVvXsEieFrDXaQ3fGMN3GsWp8UH6eNYeYScEQjZTQLH3nixWlBeCTqaA0spST74X8BXn442BxwUwDR1v13BWWDASCd8gDpAsewY3IzFE2Y9VIrigqecjHJi59ZkZtqAWXfvU4hyphenhyphen-wDu3w_YGP3o//" /></a>
<a href='your-facebook-url' rel='nofollow' target='_blank' title='facebook'><img src="https://blogger.googleusercontent.com/img/b/R29vZ2xl/AVvXsEhfw_GzEjY60aXLMm2hNINxrE1AjKXghGc6ssCA98qu1axJQJnnkJjnl6Xm_Ol_vbKdyFC3IghvlaonNujIs0WoQ-KPyDML7B-RKPZLCgzecYDKcSia3qmrvwc9jil_qxXRtthOtv19w7g/s1600/facebook--box.png" /></a>
<a href='your-delicious-url' rel='nofollow' target='_blank' title='delicious'><img src="https://blogger.googleusercontent.com/img/b/R29vZ2xl/AVvXsEi-rlfrtLuRYsngRMjaR-hPknNGx80yfhdotHa0SjRPV3iDAv0NzVpFv4waOrB03hfZRkl8B6bCEutd80TZmrdYNs__2dZSr6d3SdlJz_WN9dMDA8DbUXm81-JTN4pkr9xCmLf7y3H1hBc/s1600/delicious-box.png" /></a>
<a href='your-stumbleupon-url' rel='nofollow' target='_blank' title='stumbleupon'><img src="https://blogger.googleusercontent.com/img/b/R29vZ2xl/AVvXsEjfywLwOjsCzWLs2DNEDWAnAWy2dNIr9ynpsLEJZjr1U7aKn-svO6mj7ajVjUMLoTp54C2nvPeLP9Rl6f-8a_AiyuFcpDUZrfBO-kd2lI3PerFPJxhwJBBjeQqklgSKNQCNRoKQ28wmcFE//" /></a>
<a href='your-linkedin-url' title='linkedin'><img src="https://blogger.googleusercontent.com/img/b/R29vZ2xl/AVvXsEhGYFRjbuzMD9Y76V7aO3K4VGECSQiVsS6fsPf4Jvgex6tfZOlr82xOhJlfGFbdgyfUwf0uIVRoDTAcSoiAf4aGE_ghyphenhyphenLMlpxljsIEtd35rxlosvd53-j4R-LYz21iKTGkutgZ1djznE90//" /></a>
<a href='your-contact-url' title='contact'><img src="https://blogger.googleusercontent.com/img/b/R29vZ2xl/AVvXsEiuOc8dY5nzoKTR-zHtbC1qWl1HterxcIgcx8c4kBqldEEP_ytKmj3QiKC2a6H1VJAqdMjJpHYZ6JOblf93QzFYEBWnfFhb31nSgB_RLl0ElYoimO9jbrGQePIV7-sXJb-_3GhxKgbnQPM//" /></a>
<form action='http://feedburner.google.com/fb/a/mailverify?uri=YOUR-FEEDBURNER-ID&loc=en_u' method='post' onsubmit='window.open(\'http://feedburner.google.com/fb/a/mailverify?uri=YOUR-FEEDBURNER-ID', \'popupwindow\', \'scrollbars=yes,width=550,height=520\');return true' target='popupwindow'><p><input name="email" style="width:230px; border: 1px solid #ccc; padding: 5px;" type="text" value="Enter your email address" /></p><input name="uri" type="hidden" /><input name="loc" type="hidden" value="en_US" /></form>
<p><span><a class='rss-boxicon' href='http://feeds2.feedburner.com/YOUR-FEEDBURNER-ID' rel='nofollow' target='_blank'>RSS</a></span>
<span><a class='email-boxicon' href='http://feedburner.google.com/fb/a/mailverify?uri=YOUR-FEEDBURNER-ID&loc=en_u' rel='nofollow' target='_blank'>Email</a><span><span style="float:right;"><a href='http://feeds.feedburner.com/YOUR-FEEDBURNER-ID' rel='nofollow'><img alt="" height="26" src="http://feeds.feedburner.com/~fc/YOUR-FEEDBURNER-ID?bg=ff9900&fg=000033&anim=0" style="border:0;float:right;margin-top:0px;" width="88" /></a></span></span></span></p>
</div>
Now Replace,
your-twitter-url,
your-facebook-url,
your-delicious-url,
your-stumbleupon-url,
your-linkedin-url,
your-contact-url,
YOUR-FEEDBURNER-ID with your details.
Configure Multi Tab view widget:Add this code into the HTML/JavaScript box.
<div id='tabzine'>
<ul class='tabnav'>
<li class='pop'><a href='#tab11'>Video</a></li>
<li class='fea'><a href='#tab22'>Recent</a></li>
<li class='rec'><a href='#tab33'>Popular</a></li>
</ul>


<!-- tab1 -->
<div class='tabdiv' id='tab11'>

ENTER-TAB-1-CONTENT-HERE

</div>
<!--/tab1-->


<!-- tab2 -->
<div class='tabdiv' id='tab22'>

ENTER-TAB-2-CONTENT-HERE

</div>
<!-- tab2 -->


<!-- tab3 -->
<div class='tabdiv' id='tab33'>

ENTER-TAB-3-CONTENT-HERE

</div>
<!-- /tab3 -->


</div>
Now Replace,
ENTER-TAB-1-CONTENT-HERE,
ENTER-TAB-2-CONTENT-HERE,
ENTER-TAB-3-CONTENT-HERE with your contents.
How To Add Search BoxAdd this code into the HTML/JavaScript box.
<div id='search' style='display:inline;'>
<form action='/search' id='searchform' method='get'>
<input id="s" name="q" type="text" value="" />
<input id="searchsubmit" type="submit" value="Search" />
</form>
</div>
How To Configure Favicon:Login to your blogger dashboard--> layout- -> Edit HTML.Now Scroll down to where you see below code :
<link href='YOUR-FAVICON-URL' rel='shortcut icon' type='image/vnd.microsoft.icon'/>
Now replace "
YOUR-FAVICON-URL" with your Favicon address/url.
Configure Featured Content Slider:Add this code into the HTML/JavaScript box.
<script type="text/javascript">
stepcarousel.setup({
galleryid: 'mygallery', //id of carousel DIV
beltclass: 'belt', //class of inner "belt" DIV containing all the panel DIVs
panelclass: 'panel', //class of panel DIVs each holding content
autostep: {enable:true, moveby:1, pause:3000},
panelbehavior: {speed:500, wraparound:true, persist:true},
defaultbuttons: {enable: true, moveby: 1, leftnav: ['https://blogger.googleusercontent.com/img/b/R29vZ2xl/AVvXsEhb_1URiVlmdLL1wlX1eNmN6Cp4bVuKwgipU0KevOzTTBX2brhkIfdHzluzTGh2BLH9rbs1ko8oFc9XCkMJ8e4qG8r8j3thYH0Ce4ihbOyb91Ek8kfJfkAWpxcBK0CqNZjlWLCtowYo-9o//', -29, 90], rightnav: ['https://blogger.googleusercontent.com/img/b/R29vZ2xl/AVvXsEhWadvO5648rQASBsk8YegQeHFk_GfIUXESDVmToBE-OcxUTfQ_Z_xufcixwGaiWIecu0GB4pxndvD83JQVsZ4zebXCHwjaAo2EBwLvBAF7Ou5-L5vhuAKBPJcqFg4XXzZEgRzXk5OqM4U/s1600/fleche2.png', -18, 90]},
statusvars: ['statusA', 'statusB', 'statusC'], //register 3 variables that contain current panel (start), current panel (last), and total panels
contenttype: ['inline'] //content setting ['inline'] or ['external', 'path_to_external_file']
})


</script>


<div id="slider">
<div id="mygallery" class="stepcarousel">
<div class="belt">

<div class="panel">
<img src="Slider-1-Image-Address-Here" alt="" />
<h2><a href="Slider-1-Link-Here">Slider-1-Title-Here</a></h2>
<p>Enter-Slider-1-Description-Here</p>
</div>


<div class="panel">
<img src="Slider-2-Image-Address-Here" alt="" />
<h2><a href="Slider-2-Link-Here">Slider-2-Title-Here</a></h2>
<p>Enter-Slider-2-Description-Here</p>
</div>


<div class="panel">
<img src="Slider-3-Image-Address-Here" alt="" />
<h2><a href="Slider-3-Link-Here">Slider-3-Title-Here</a></h2>
<p>Enter-Slider-3-Description-Here</p>
</div>

<div class="panel">
<img src="Slider-4-Image-Address-Here" alt="" />
<h2><a href="Slider-4-Link-Here">Slider-4-Title-Here</a></h2>
<p>Enter-Slider-4-Description-Here</p>
</div>

<div class="panel">
<img src="Slider-5-Image-Address-Here" alt="" />
<h2><a href="Slider-5-Link-Here">Slider-5-Title-Here</a></h2>
<p>Enter-Slider-5-Description-Here</p>
</div>


</div>
</div>
</div>

<div style='border-top:1px solid #050505;border-bottom:1px solid #353434;height:0px;width:100%;'/></div>
Now Replace
Slider-X-Image-Address-Here,
Slider-X-Link-Here,
Slider-5-Title-Here,
Enter-Slider-5-Description-Here with your contents.Look at the example below:
<script type="text/javascript">
stepcarousel.setup({
galleryid: 'mygallery', //id of carousel DIV
beltclass: 'belt', //class of inner "belt" DIV containing all the panel DIVs
panelclass: 'panel', //class of panel DIVs each holding content
autostep: {enable:true, moveby:1, pause:3000},
panelbehavior: {speed:500, wraparound:true, persist:true},
defaultbuttons: {enable: true, moveby: 1, leftnav: ['https://blogger.googleusercontent.com/img/b/R29vZ2xl/AVvXsEhb_1URiVlmdLL1wlX1eNmN6Cp4bVuKwgipU0KevOzTTBX2brhkIfdHzluzTGh2BLH9rbs1ko8oFc9XCkMJ8e4qG8r8j3thYH0Ce4ihbOyb91Ek8kfJfkAWpxcBK0CqNZjlWLCtowYo-9o//', -29, 90], rightnav: ['https://blogger.googleusercontent.com/img/b/R29vZ2xl/AVvXsEhWadvO5648rQASBsk8YegQeHFk_GfIUXESDVmToBE-OcxUTfQ_Z_xufcixwGaiWIecu0GB4pxndvD83JQVsZ4zebXCHwjaAo2EBwLvBAF7Ou5-L5vhuAKBPJcqFg4XXzZEgRzXk5OqM4U/s1600/fleche2.png', -18, 90]},
statusvars: ['statusA', 'statusB', 'statusC'], //register 3 variables that contain current panel (start), current panel (last), and total panels
contenttype: ['inline'] //content setting ['inline'] or ['external', 'path_to_external_file']
})


</script>


<div id="slider">
<div id="mygallery" class="stepcarousel">
<div class="belt">

<div class="panel">
<img src="https://blogger.googleusercontent.com/img/b/R29vZ2xl/AVvXsEjRzqJaWegJdg0sCNZzeftHD6B7FU7j_vJKBfg_f5y5Ff8a0eYiHkZJ6cXJBl5EdaaJrYaEGJ7NsWBR_156pz02MrYh0FSZzADS4AANTwO-kDDJxzrUTptMDpv4H9Awbai4Cn7CQu43TvI/s1600/slide1.jpg" alt="" />
<h2><a href="Slider-1-Link-Here">Slider-1-Title-Here</a></h2>
<p>Lorem ipsum dolor sit amet, consectetuer adipiscing elit. Aenean commodo ligula eget dolor. Aenean massa. Cum sociis natoque penatibus et magnis dis parturient montes, nascetur ridiculus mus. Donec quam felis, ultricies nec, pellentesque eu, pretium quis, sem. Nulla consequat massa quis enim.</p>
</div>


<div class="panel">
<img src="https://blogger.googleusercontent.com/img/b/R29vZ2xl/AVvXsEiPv_xv-6yYxjL715HfK7PORfkWAFJmBhI0EWueaXvGWItbvOl0Z7taukZkN4_w9paq6GuXEO95dJZkVuni7A702eCGci9yfI2FFmYnCZES8T8aHv7edon61UFLOoWbf-oWfuaY9Iv0DuE/s1600/slide2.jpg" alt="" />
<h2><a href="Slider-2-Link-Here">Slider-2-Title-Here</a></h2>
<p>In enim justo, rhoncus ut, imperdiet a, venenatis vitae, justo. Nullam dictum felis eu pede mollis pretium. Integer tincidunt. Cras dapibus. Vivamus elementum semper nisi. Aenean vulputate eleifend tellus. Aenean leo ligula, porttitor eu, consequat vitae, eleifend ac, enim. Aliquam lorem ante, dapibus in, viverra quis, feugiat a, tellus. Phasellus viverra nulla ut metus varius laoreet.</p>
</div>


<div class="panel">
<img src="https://blogger.googleusercontent.com/img/b/R29vZ2xl/AVvXsEiPecnRVksHerb-0pfDPb3WzFm9kZKul1rW_Z6UqxE1vhKA74CcgrSEpUal0eMcwAGcfFQNSZz5MwuxS2ckmvRFyo5AlPqYbPCLsZ1Xifnx-_sLR8S7kYUZejAc2V-_xbeDJb__na0HQQo/s1600/slide3.jpg" alt="" />
<h2><a href="Slider-3-Link-Here">Slider-3-Title-Here</a></h2>
<p>Aenean imperdiet. Etiam ultricies nisi vel augue. Curabitur ullamcorper ultricies nisi. Nam eget dui. Etiam rhoncus. Maecenas tempus, tellus eget condimentum rhoncus, sem quam semper libero, sit amet adipiscing sem neque sed ipsum. Nam quam nunc, blandit vel, luctus pulvinar, hendrerit id, lorem.</p>
</div>

<div class="panel">
<img src="https://blogger.googleusercontent.com/img/b/R29vZ2xl/AVvXsEgqGfzDNS0wRvtFItYGDtyDwsAyTvyf6e3GyjtON1ZmHj4jZZxr9RNTpYe0oAAl0DfUsk0AikzyrGUQfQ2eDAshQcGJjONs-JqxYDjnMDxqYqqK_kPaQm-ITZ9AXS5nYpBf9Mdk_MqnsXc/s1600/slide4.jpg" alt="" />
<h2><a href="Slider-4-Link-Here">Slider-4-Title-Here</a></h2>
<p> dui quis mi consectetuer lacinia. Nam pretium turpis et arcu. Duis arcu tortor, suscipit eget, imperdiet nec, imperdiet iaculis, ipsum. Sed aliquam ultrices mauris. Integer ante arcu, accumsan a, consectetuer eget, posuere ut, mauris. Praesent adipiscing. Phasellus ullamcorper ipsum rutrum nunc. Nunc nonummy metus. Vestibulum volutpat pretium libero. Cras id dui.</p>
</div>

<div class="panel">
<img src="https://blogger.googleusercontent.com/img/b/R29vZ2xl/AVvXsEjAa52XQ1STe0lDSmKHvo1AEre5X7yFh8sS8oZePeB3YwtdQVvu9Gv9uw6UxYjSKhkEbZ6WvPMcWgAXXUXboevqYACtEIt7DwqQeDn70VnZRKdoDzHAgZCLNFgEdt4gesTcELnjD7_fxXw/s1600/slide5.jpg" alt="" />
<h2><a href="Slider-5-Link-Here">Slider-5-Title-Here</a></h2>
<p>Aenean tellus metus, bibendum sed, posuere ac, mattis non, nunc. Vestibulum fringilla pede sit amet augue. In turpis. Pellentesque posuere. Praesent turpis. Aenean posuere, tortor sed cursus feugiat, nunc augue blandit nunc, eu sollicitudin urna dolor sagittis lacus.</p>
</div>


</div>
</div>
</div>

<div style='border-top:1px solid #050505;border-bottom:1px solid #353434;height:0px;width:100%;'/></div>
Configure "Blog Posts" WidgetLogin to your blogger dashboard--> layout- -> Page elements.Click on "Edit" form "Blog Posts" Section.Now change it value as the picture below:
 Important !!!:
Please do not remove the footer credit. I spend several hours to create this blogger template. So that you can use it for your blog. All I ask is, stay the credit intact.

 Vasiliki is a responsive blogger template by besttheme.net.It's main features are dynamic grid layout, auto read more and auto thumbnail.